Arduino Temperature Probe: A Comprehensive Guide to Monitoring and Controlling Temperature
Abstract:
Welcome to our comprehensive guide on using an Arduino temperature probe for monitoring and controlling temperature. In this article, we will explore the importance of temperature monitoring, introduce the Arduino platform, and provide step-by-step instructions on how to build your own temperature probe system. Whether you are a hobbyist or a professional, this guide will equip you with the knowledge and skills needed to effectively measure and manage temperature in various applications.
Table of Contents:
1. Introduction to Temperature Monitoring
2. Understanding Arduino: The Perfect Platform for Temperature Control
3. Building Your Arduino Temperature Probe System
3.1 Components Required
3.2 Circuit Design
3.3 Writing Code for Temperature Measurement
3.4 Displaying Temperature Readings
4. Advanced Features and Applications
4.1 Logging Temperature Data
4.2 Setting Temperature Thresholds and Alerts
5. Best Practices for Temperature Monitoring and Control
5.1 Calibrating Your Temperature Probe
5.2 Ensuring Accuracy and Precision
5.3 Incorporating Redundancy and Fail-Safe Mechanisms
6. Conclusion
1. Introduction to Temperature Monitoring
Monitoring temperature is crucial in various industries and applications, including home automation, food safety, HVAC systems, scientific research, and more. By accurately measuring and controlling temperature, you can prevent equipment failure, optimize processes, ensure product quality, and create comfortable living environments. An Arduino temperature probe offers a cost-effective and versatile solution to achieve these objectives.
2. Understanding Arduino: The Perfect Platform for Temperature Control
Arduino is an open-source electronics platform that enables users to create interactive projects. With its user-friendly interface and extensive community support, Arduino has gained popularity among enthusiasts and professionals alike. Its compatibility with various sensors, including temperature sensors, makes it an ideal choice for temperature monitoring and control projects.
3. Building Your Arduino Temperature Probe System
3.1 Components Required
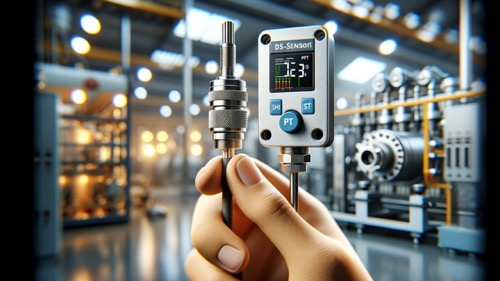
To build a temperature probe system, you will need the following components: Arduino board (such as Arduino Uno), temperature sensor (e.g., DS18B20), breadboard, jumper wires, and a display module (optional).
3.2 Circuit Design
Connect the temperature sensor to the Arduino board following the provided pinout diagram. Utilize jumper wires and a breadboard to establish the necessary connections. Ensure proper connections and check for any loose connections or shorts.
3.3 Writing Code for Temperature Measurement
Using the Arduino Integrated Development Environment (IDE), write code to read temperature data from the sensor. Implement appropriate libraries and functions for accurate temperature measurements. Don’t forget to include error handling and calibration routines for enhanced accuracy.
3.4 Displaying Temperature Readings
If desired, connect a display module (such as an LCD) to the Arduino and display temperature readings in real-time. This allows for convenient monitoring and visualization of temperature data.
4. Advanced Features and Applications
4.1 Logging Temperature Data
Extend the functionality of your Arduino temperature probe by adding data logging capabilities. Store temperature readings in a memory card or communicate with a computer for long-term data analysis and tracking.
4.2 Setting Temperature Thresholds and Alerts
Create a temperature control system by setting temperature thresholds and configuring alerts. Use relays or other output devices to trigger actions when the temperature exceeds predefined limits. This feature is particularly useful in industrial applications or environments where immediate actions are required.
5. Best Practices for Temperature Monitoring and Control
5.1 Calibrating Your Temperature Probe
Regularly calibrate your temperature probe to ensure accurate readings. Follow industry standards and utilize appropriate calibration equipment or procedures.
5.2 Ensuring Accuracy and Precision
Implement measures to maintain accuracy and precision, such as periodic sensor maintenance, reducing environmental interference, and employing advanced calibration techniques.
5.3 Incorporating Redundancy and Fail-Safe Mechanisms
Consider implementing redundancy and fail-safe mechanisms in critical temperature control systems. Backup sensors, duplicate circuits, or automated switches can prevent system failures and ensure continuous operation.
6. Conclusion
In this guide, we have covered the essentials of Arduino temperature probe systems, from understanding the importance of temperature monitoring to building your own temperature measurement setup. By leveraging the versatility and affordability of Arduino, you can create custom temperature control solutions for various applications. Monitor, control, and optimize temperature with confidence using an Arduino temperature probe.
Remember, accurate temperature monitoring is essential for achieving desired outcomes in numerous fields. Whether you are a hobbyist or a professional, dive into the world of Arduino temperature probes and unlock a multitude of possibilities.

The Growing World of Electrical Parts Manufacturing: A Business on the Rise
In today’s world, electrical parts are everywhere, powering everything from everyday household gadgets to complex industrial machinery. Whether we realize it or not, electrical components make the world go round.


